The user can change settings in each created 3D scene separately. In other cases it would be easier to set the common settings to be used when creating new scenes, just once in the Preferences dialog.
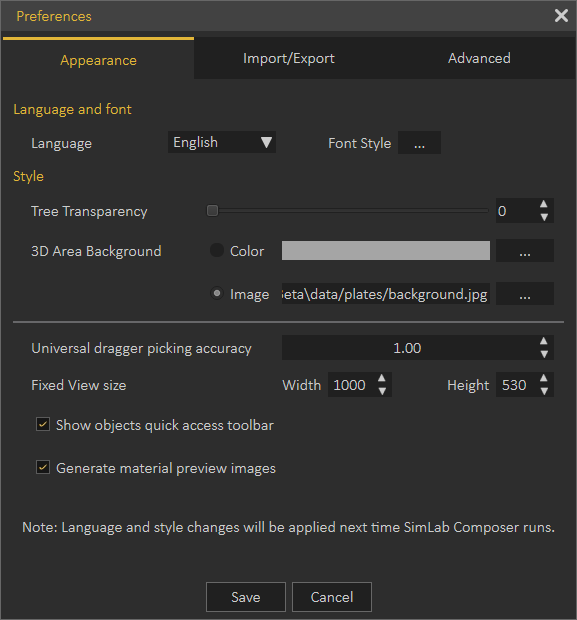
Appearance Tab
In this tab the user can set the preferred appearance options in SimLab Composer, including:
Language and font; the user can select the language and the font style to be used in SimLab Composer from the supported languages combo box, and available fonts list. Changing the language, and font takes effect next time SimLab Composer runs.
Style; the user to change the transparency for the objects Tree, and set appearance for 3D area. The 3D area appearance can be set as color, or background image.
To set a Background Image for the 3D Area, that is invisible during rendering:
Go to Preferences » Appearance tab » 3D Area Background » Browse to select an image.
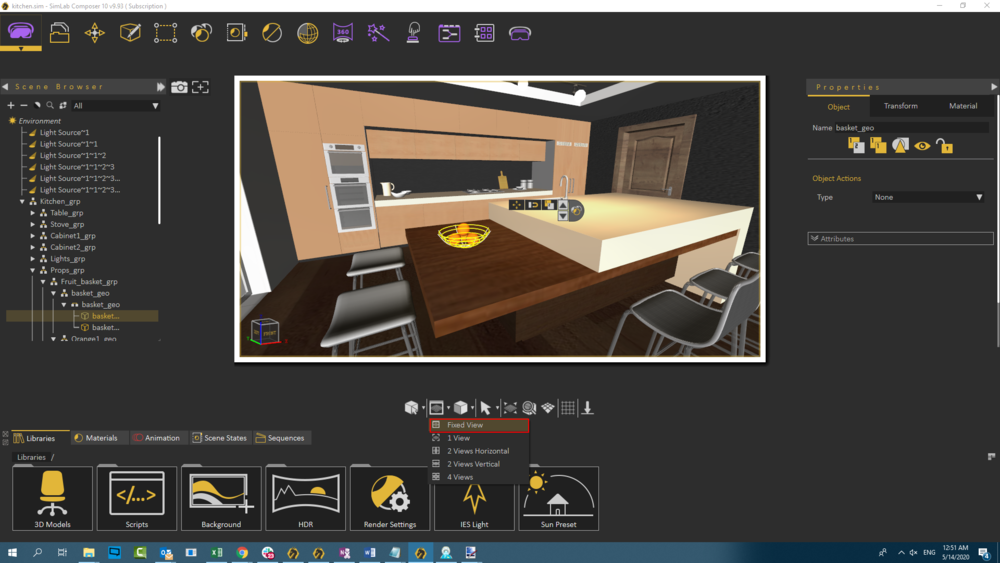
Fixed View size; when the user picks the view setting in SimLab Composer to fixed view, the width and height of this view are set here.
Show objects quick access toolbar; shows the Quick Access Toolbar for ease of access for its objects functionalities.
Generate material preview images; generates preview images to the scene materials in the Scene Materials dialog.
Import/Export Tab
Import Measurements and Text Annotations; the user can select to import measurement and text annotations created in the design CAD package.
Import Polylines can also be checked, and the width of the imported lines can be specified.
Automatically generate texture coordinates; texture coordinates for the imported geometry will be automatically generated when this option is checked.
Scale down preview images of textures; reduces the size of textures images for improving interactivity.
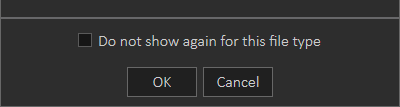
Import/Export file dialog; is show all by default. So every time the user imports or exports models / scense the dialogs will appear.
If the user checks the "Do not show again for this file type" option in the dialog, clicking this option again will reset the dialogs to show for all.
Import/Export Tab
Automatically transform imported models; when checked, the first imported model will be automatically transformed/scaled by the value entered in the ‘First model size to world size’ text box, to the largest dimension of the world size of that scene. The model will be placed in the center of the world.
The same transform/scale will be applied to all imported models in that scene.
In the image shown to the right, the same model was imported twice, with import measurements and polylines options checked. The first time Line Width was set to 1.5, and then to 5.0 in the second. As can be seen in the image the trees branches are wider in the second time.
Export Units: are units to be used when exporting 3D models from SimLab Composer. By default SimLab Composer uses meter units, and the user has the option to select different units. All numbers will be converted to the selected unit to maintain the correct size of the exported object.
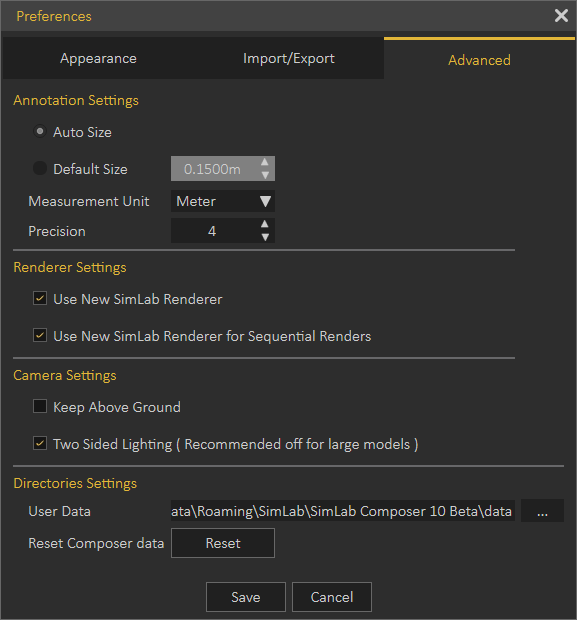
Advanced Tab
In the Annotation Settings group; the user can select to let SimLab Composer Auto set the size of the annotations, or set its Default Size.
Measurement Units, and its Precision can also be set here.
Renderer Settings group; is where the user can select the renderer to use. The user has the option to choose between new ISPC renderer or old CPU renderer. The user can check the option in this group for static renders or animation rendering (sequential).
Camera Settings group; has two options Keep Above Ground; stops the camera rotation at the ground level, and will not go below, and it is applicable to Parallel and Perspective cameras.
Two Sided Lighting; when checked will draw faces based on normal directions. It is recommended to uncheck this option for large scenes.
Directories Settings group; the user may select to move the User Data directory to a new location; the user should copy the original data to the new location before setting the new User Data folder.
Reset Composer data button; will reset the composer data to its original setting.
Register
Displays the License Dialog, where the user can manage the Composer license. The user can buy professional licenses, or get free trials. For more information about requesting/activating a license go to this page.