Time Line provides the user with a tool to visualize and edit animation key frames. The time line is displayed by default in the Library panel of the Animation workbench. Click the Show/Hide details button in the top right part of the time line, to show or hide the timeline details.
In the timeline the user can also set the animation duration, by setting the end key frame value.
The current frame is marked on the time line by a red vertical line. The names of the animated objects appear on the left part of the time line, clicking on the name of any object automatically selects it in the 3D area.
The current frame is marked on the time line by a red vertical line. The names of the animated objects appear on the left part of the time line, clicking on the name of any object automatically selects it in the 3D area.
The user can play animation by clicking the Play Animation button in the animation time line, or by hitting the Space Bar. The tool bar also includes the tool buttons Go to First Frame (Shortcut Home) and Go to Last Frame (Shortcut End).
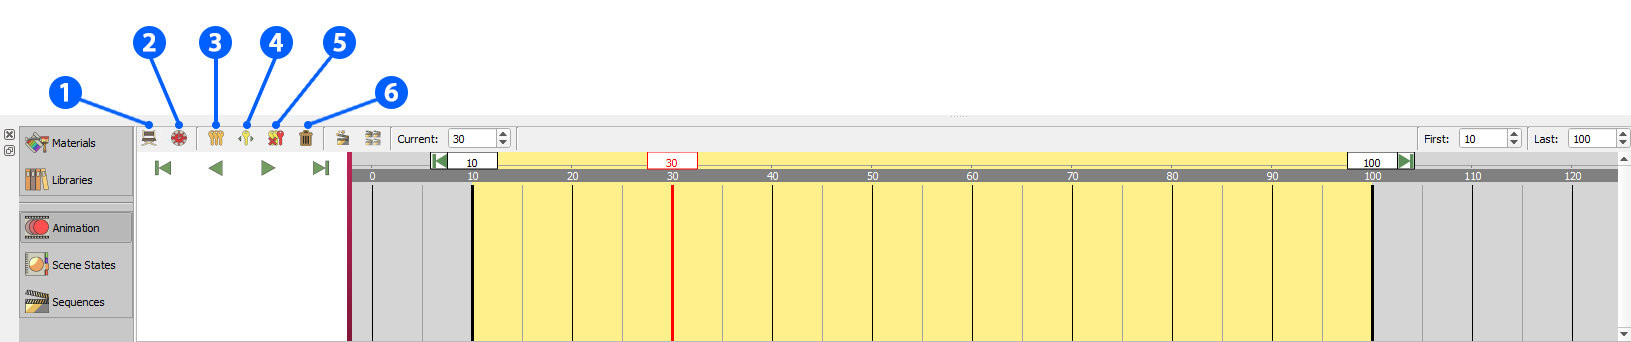
1. Director Record button, which can be used for managing animations from multiple cameras
2.Scale Time Line
3. Copy and move selected key frames
4. Move selected key frames
5. Delete selected key frames
6. Delete all animations
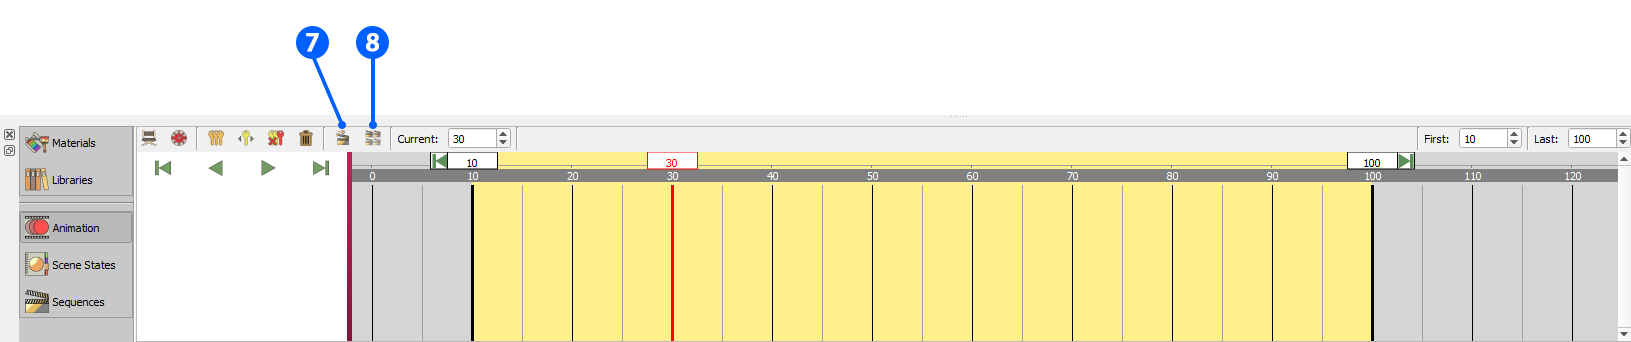
7. Create an animation sequence
8.Show animation sequence list
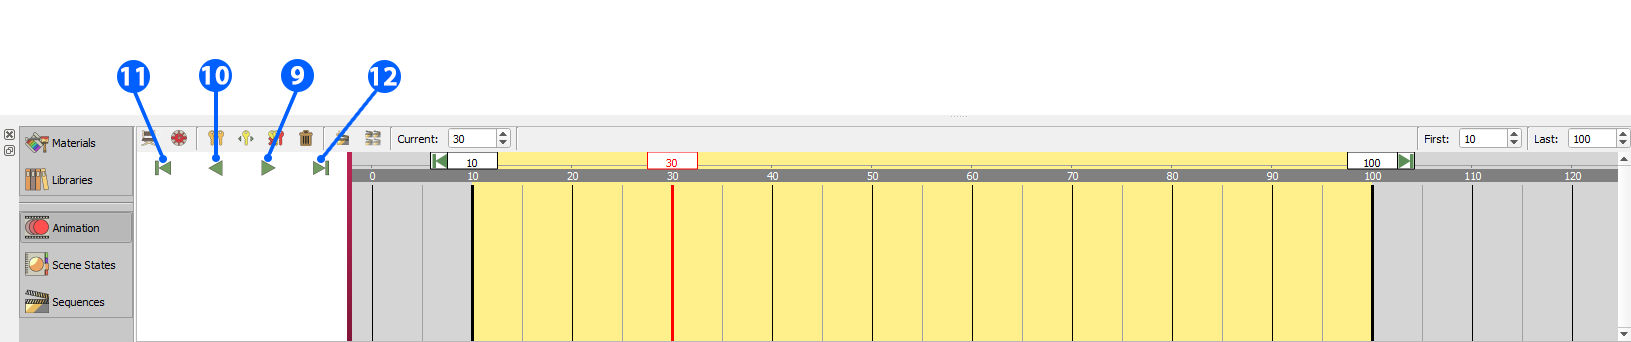
9. Play animation (Space)
10. Play animation backward (Ctrl+Space)
11. Go to first frame (Home)
12. Go to last frame (End)
Clicking on an animation key frame on the time line will show its properties, in the Properties panel. The user can change these properties, for different types of animation.
The user can also change the location of any key frame on the time line, by selecting then dragging it from a location to another.