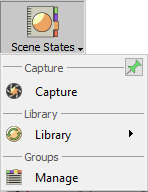
Scene States enable users to capture different configurations for the selected 3D model(s), or for the whole scene. The User can check the properties to include in a scene state, from the Default Apply group in this tool. SimLab Composer’s Scene States are smart in capturing attributes; they can include any combination of the listed attributes. This can be helpful in creating scene states for models with different attributes, and setups.
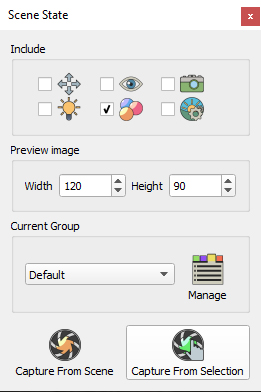
The user can also set the width and height for the scene state preview Image, to match the settings in the export template.
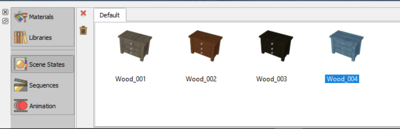
With the properties checked, the user needs to click the Capture option, to be either From Scene or From Selection. The first option will capture a scene state for the whole scene with the properties checked in the Default Apply group. The From Selection capture option captures a scene state for the selected model(s), with the checked properties. Depending on the checked properties, the generated scene state will be added to the corresponding tab(s) in the Scene States library.
Library
A button, if clicked, will regenerate new icon/thumbnail images for the content of the corresponding library, for display purpose only. A warning message appears.
The Regenerate option will generate a rendered preview image for the selected scene state, with the size specified in the Preview Image group. The Regenerate All option, will generates rendered preview images for all the scene states.
Scene states have many useful applications including;
Manage
a button displays the Manage Material Libraries dialog box if clicked. In its dialog box, you can create new group, remove group, rename group. You can also move groups up and down.
To Create a Scene States, Follow the steps below:
1. Open the Simlab Composer.
2. Import the model which you want to make Scene State on it.
3. Now, click Materials Library in Navigation Panel to view all materials in the library, then drag-and-drop desired material on the model.
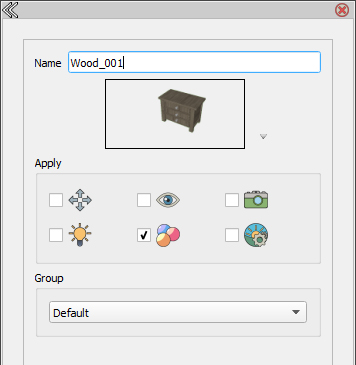
4. Select the object and click Scene States → Capture, the Scene State dialog will appear.
5. In the dialog above, select Materials State then click Capture From Selection, now the state will appear in the