Object Animation Group
|
|
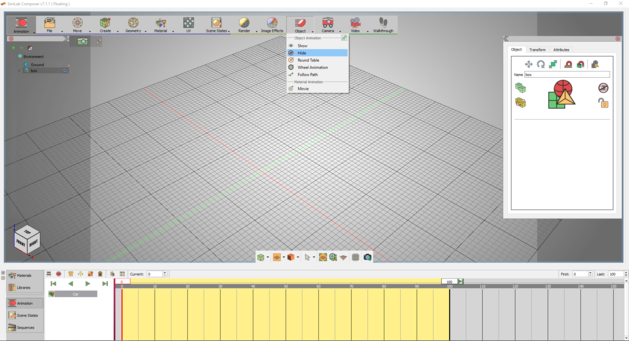
Show/Hide Object Animation
|
|
|
Selecting a 3D object at any frame other than zero and clicking Hide from Object Animation group, will add a key frame at that location and the object will be hidden there. Another key frame will be added at frame zero, with the object shown. Using these two functions hide/show animations can be created easily.
|
|
|
 |
|
|
Round Table
|
|
|
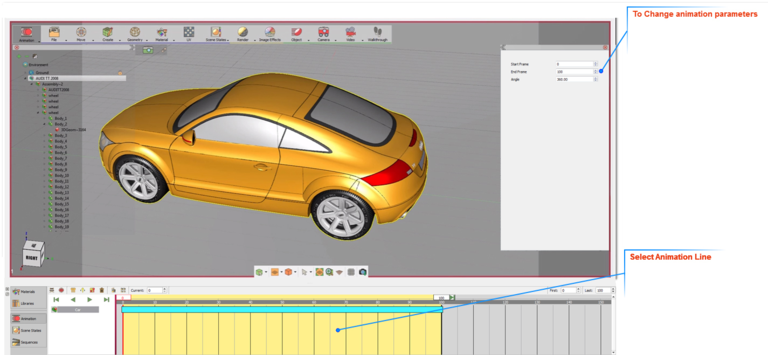
Round Table Object animation rotates the selected object by default, 360 degrees around the global z axis. The animation starts at frame 0 and ends at the last specified frame. Selecting the green animation line of the object, in the Time Line, will display the animation parameters in the Properties Panel of the application interface, as shown in the image below.
The user can select to change the Start/End frames, as well as the angle of rotation.
|
|
|
 |
|
|
Wheel Animation
|
|
|
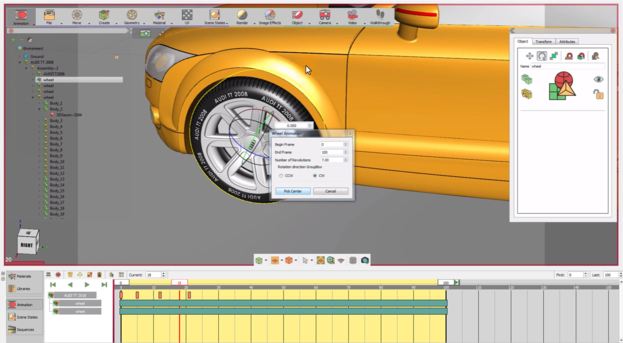
Wheel Animation is useful for rotating object(s) around a selected axis. To create wheel animation the user needs to select the object(s) to be rotated, then to click this function button. In the image shown below one of the loader’s tires were selected. To be able to precisely select the wheel’s center, change the pick mode to Pick Center of Curvature. This will generate edges for the whole scene and will select the center of the selected curvature precisely. The wheel animation dialog will appear where the user can set the animation parameters.
|
|
|
Select the start frame for the animation, the end frame and the number of revolutions. Number of revolutions is the number of full rotations to be done by the selected object(s). The user can also select the rotation direction to be Clockwise or Counter Clockwise the direction is determined using the right hand rule around the rotation axis, always points out of the geometry.
|
|
|
 |
|
|
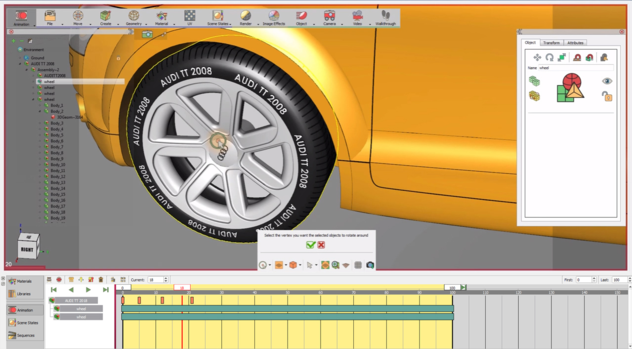
Click Pick Center, and select the circle of the tire. The normal of the circle’s center will be highlighted, click the approve icon to end the process. As can be seen in the image, an animation line for the Tier has been added to the time line.
|
|
|
Selecting this green line will display wheel animation parameters, in the Properties Panel of SimLab Composer interface. The user can change the Start and End frames for the animation, as well as the angle of rotation. In the Wheel Animation dialog shown above, the Number of Revolutions was set to 10. This will result in 10 * 360 = 3,600 angle of rotation.
|
|
|
 |
 |
Following the same steps, the user can create wheel animations to the other three tires of the loader.
|
|
|
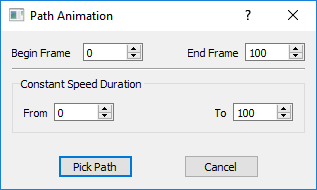
Follow Path
|
|
|
Path animation can be used to make an object follow a predefined path. This object can be a 3D object, a camera or a light in the scene.
|
|
|
|
|
|
 |