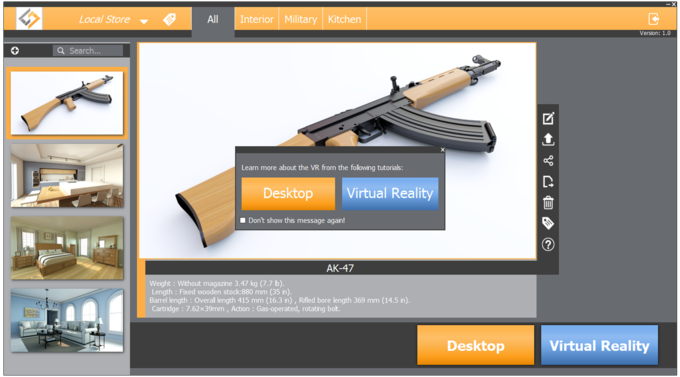
As another part of the SimLab VR framework for users, VR Viewer is an application that presents a professional way to store, manage, exhibit, share your VR scenes and projects with others.
Using SimLab VR Viewer allows user to see the list of available 3d models on the left side of the framework, after selecting the models the user can starting desktop viewer or VR mode.
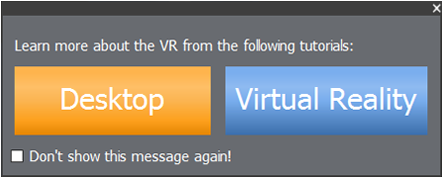
The user can access the online tutorial page by clicking on the image below on our website for more tutorials: http://simlab-soft.com/3d-products/simlab-composer-tutorials.aspx.
Adding the scene on VR Viewer is very simple to do that, export the model you want to share from SimLab composer as a (*zim) file, then adding the model on the Viewer.
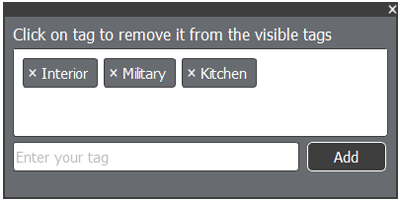
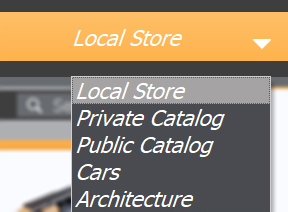
As you see in the image below, User can filter the models out of tags.
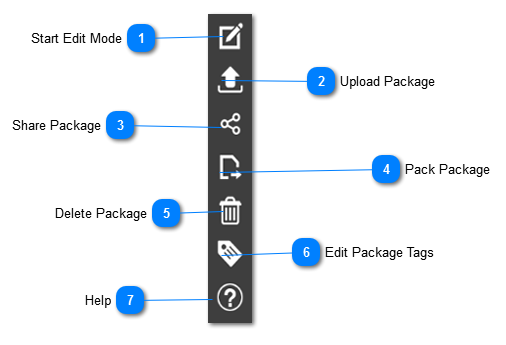
There are several elements that provide structure to how the commands are presented in the user- interface, as shown below.
Start Edit Mode: by clicking on this icon the user can add images, edit the title and the publisher and edit the description.
Upload Package:
Share Package:
Pack Package: This function button display Pack the Scene dialog, in which the user can create (*.vrpackage) file based on the selected file format from the list.
Delete Package: by clicking this icon the user can delete the package from the list.
Edit Package Tags: by clicking this icon the user can remove or add tags.
Help: by clicking this icon the user can access the online tutorial page.
Private Catalogs:
In the Free VR Viewer, users can now have two private catalogs, these catalogs contain the packeges (up to 30 packages in each catalog private and public) that the user has added to those catalogs And share them with specific friends and users as a viewer by adding their names and e-mail in the Viewer Management.
To create a private catalogs in Free VR Viewer, following the steps below:
1. Open the Free VR Viewer by double clicking its desktop shortcut or from the start menu.
2. Press on to login if you have an account, enter your email and password then press Log in, If you don't have account press and enter your information and password then press Register Now.
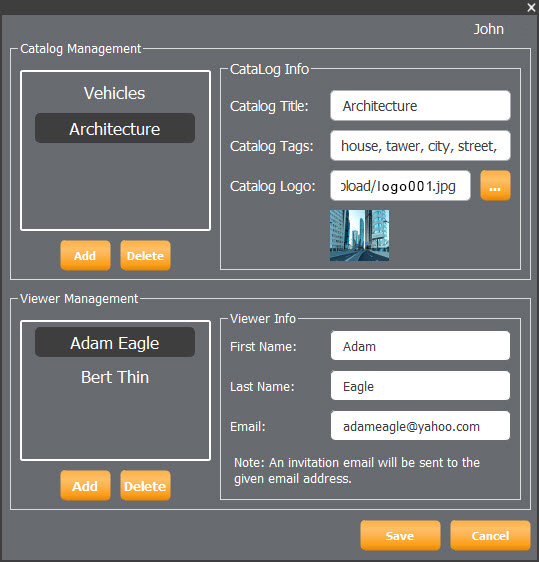
3. In your account, select Manage Catalogs from the top right, the dialog below will appear.
4. In this dialog above, press Add from Catalog Management to create a new catalog, you can create two, enter the catalog information: catalog title, tags and logo image in the Catalog Info field.
5. In the Viewer Info field, You can add more than one user who can view the packages within this catalog, to add viewer press Add and enter the first name, last name and email for viewer, when you finish press Save.
6. Now the catalogs which have created will appear in this menu below, press into any catalog and add the packeges into it.