|
|
Visualize Scene Options
|
|
|
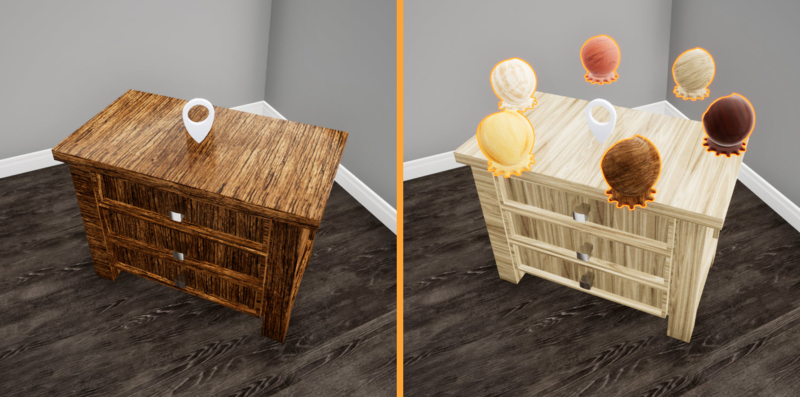
Visualize scene options (scene states and animation sequences) by displaying them as entities in 3D world for easier and practical VR experiences.
|
|
|
|
|
|
Press "Alt" on your keyboard to show Pins, "LBUTTON" to select Scene States/Animation Sequences which appear as entities from the Pins.
|
|
|
|
|
|
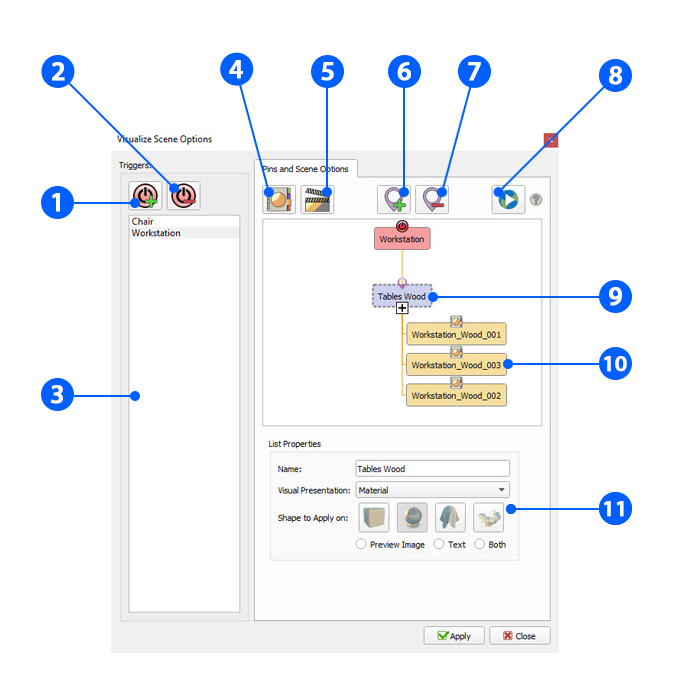
1. A Trigger displays Pins if interacted by the user in SimLab VR Viewer. To add a Trigger select a Scene Node from Tree or from the 3D Area.
2. Remove a Trigger and eleminate any associated pins and scene options.
3. The list of Triggers.
4. Activate Scene States library to drag-and-drop Scene States into Pin nodes.
5. Activate Animation Sequences library to drag-and-drop Scene States into Pin nodes.
6. Add a Pin node to the current diagram, a Pin holds scene options chosen by the user. Once added,
you can drag-and-drop either Scene States or Animation Sequences from their corresponding libraries to it.
7. Remove the selected Pin node from its diagram.
8. Watch an online video tutorial about how to visualize scene options.
9. (VR List) you can drag-and-drop Scene States/Animation Sequences here from their corresponding libraries.
10. Scene States/Animation Sequences.
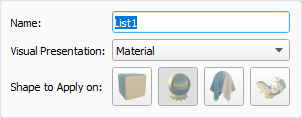
11. List Properties, you can choose the shapes to display Scene States/Animation Sequences in VR Viewer.
|
|
|
|
|
|
-
To create a Visualize Scene Options, Follow the steps below:
1. Open the SimLab Composer.
3. When you finish the previous step, click Actions → Visualize Scene Options, the Visualize Scene Options dialog will appear.
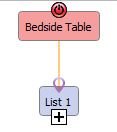
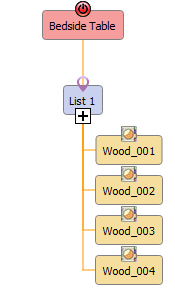
4. Select the object which you want to make list for it Ex: Bedside Table, select the table model then Add a Trigger by click 
5. The object name (Bedside Table) appeared in the Pin and Scene Options side as shown in image below.
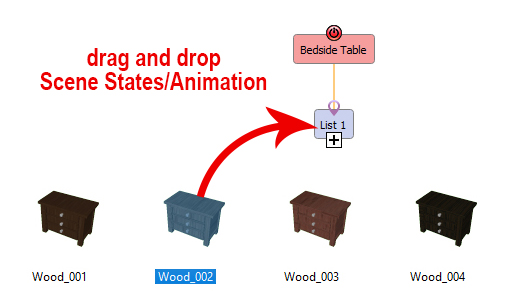
6. Now drag-and-drop Scene States/Animation Sequence (which created in step two) from Scene States Library into the VR List1 one by one. one by one.
7. The Scene States/Animation Sequence will appear under the VR List1 as shown in image below.
8. You can change the name of list and choose the shapes to display Scene States/Animation Sequences in VR Viewer from List Properties when click
9. When you finish, click  to save changes. to save changes.
|
|
|
|
|
|
In the Video below, you can show how to Visualize Scene Options for VR and Mobile.
|
|
|
|