![]()
Learn
SimLab Composer
Simab 3D Products \SimLab Composer 2.3

|


|
Tutorial:
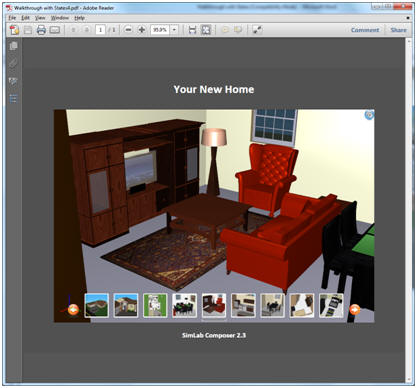
Creating House Walkthrough
Scene States can be used by architects and interior designers to present their work. By creating states for the different views of a house, the designer can export the file into a 3D PDF file, which can be opened and viewed using the free acrobat reader or the free SimLab CAD Viewer on IPad. In this tutorial we are going to use scene states to make a walkthrough in a house.
1. Create a new scene with no ground.
2. Click File -> Import or press (Ctrl + I) to import geometry. The Import Geometry window will open where you can browse for the furnished ranch house model.
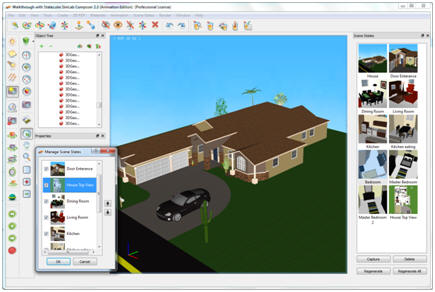
3. From the Scene States menu select Manage Scene States, where its window will open on the right of the application’s window. Change the model’s orientation, and when satisfied click the Capture button in the Scene States window. The state of the model will be captured and stored in the Scene States window.
4. Before starting the walkthrough let’s zoom into the door and capture another state.
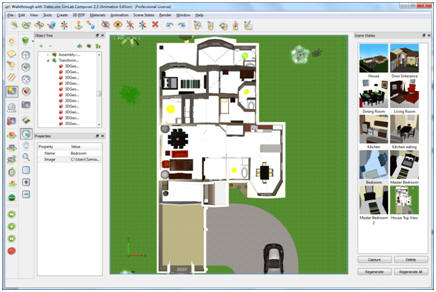
5. Now go into the different rooms, choose a good view and capture the scene states. It is a good practice to give each state a good name.
6. From 3D PDF menu select PDF Settings. Under background in the 3D tab, select the Image option, and browse to the sky image.
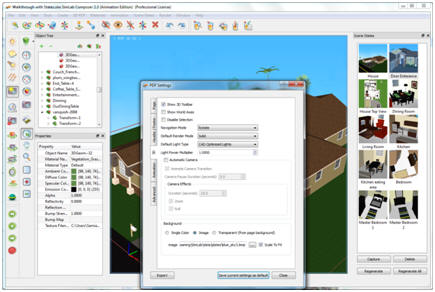
7. Click the Export button in the left lower part of the 3D PDF settings dialog to export the 3D PDF file. Click Save and the Manage Scene States window will appear. You can change the order of states if needed using the up and down arrows. Click Ok and the Exporting Geometry progress bar will appear for a short period depending on the size of the file.
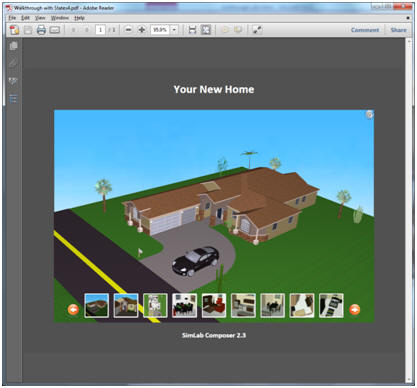
8. Browse to the PDF file, and your customer will surely be glad to be able to walk through his new home.

9. By clicking on any of the states displayed at the bottom of the 3D PDF file, it will appear in the 3D area.

10. Another useful way of sharing the model is by exporting to iPad. Go to File -> Export to iPad, and the iPad export window will appear. The file extension for the iPad files is *.zim, input a name for the file, click save.