How to add and upload a new VR model
You can upload (.vrpackage) files into the cloud at your SimLab account as VR scenes then they will be available on all of the connected and paired devices to this SimLab Account and can be shared with other SimLab users as well.
Method A: Using SimLab VR Viewer
-
Open SimLab VR Viewer and sign in to your account.

-
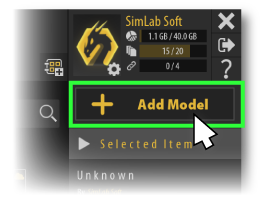
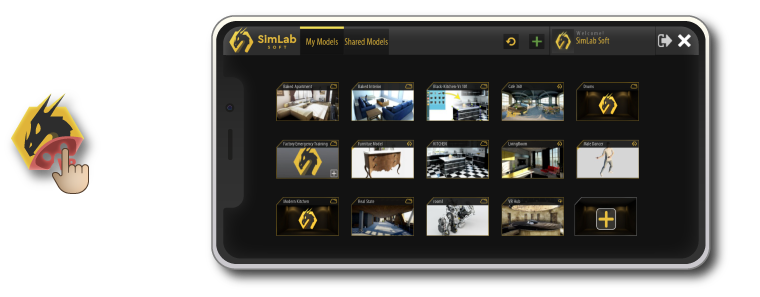
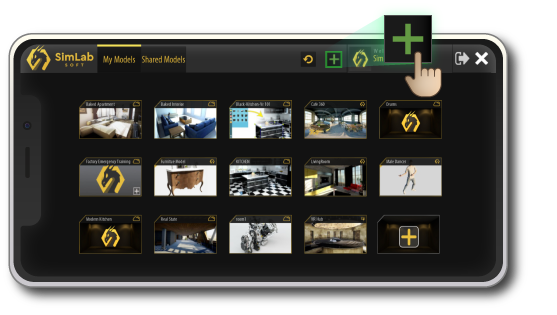
1. Click Add Model.
-
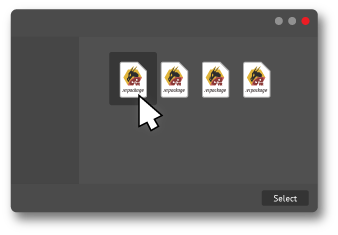
2. Browse a (.vrpackage) file.
-
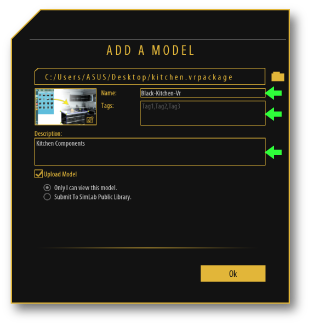
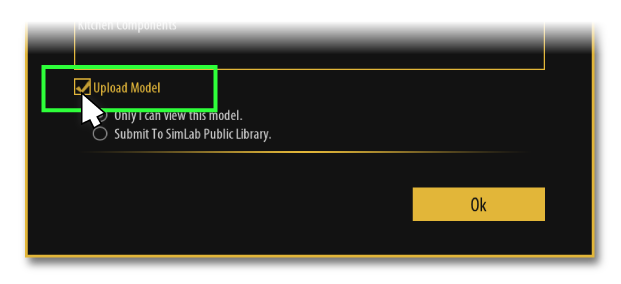
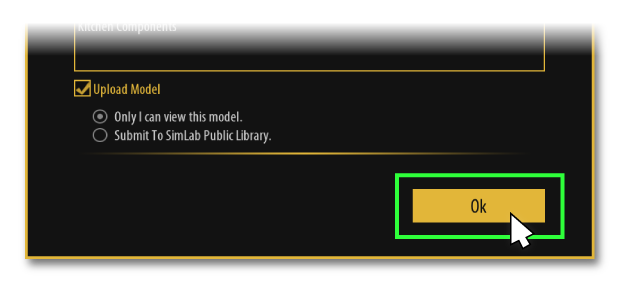
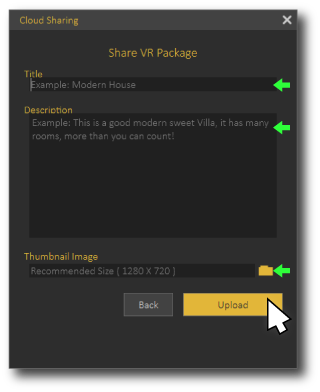
3. Fill in the package information.
-
4. Make Sure that the upload check box is checked on, otherwise, the model will be added locally and won't be available on the cloud for other devices.
-
5. Click OK.
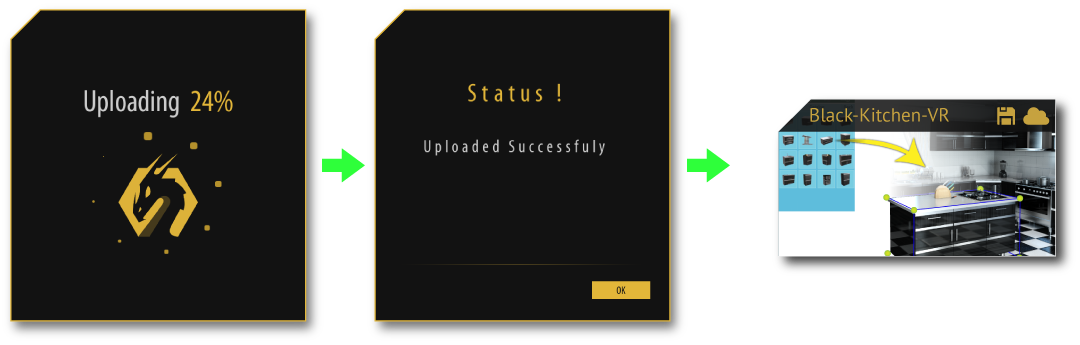
Done Now the model will start uploading, once its done it will show a pop-up message (Uploaded Successfuly), then the model can be found under MY Models tab and will be available on all of the connected and paired devices to the used SimLab Account.
Method B: Using SimLab Composer
-
1. Download and install SimLab Composer.

-
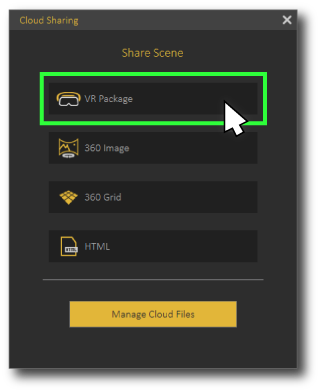
2. Go to File > Share to SimLab cloud

-
3. Sign in to your account, if you don't have one you need to create a new account.

-
4. Click on the VR Package.
-
5. Fill in the scene information then Click on Upload.
Done Now the model will start uploading, once it's done it will say (Shared Successfully), then the model can be found and shared to other users using the provided link, it will also be available on all of the connected and paired devices to the used SimLab Account on SimLab VR Viewer.

-
1. Open SimLab VR Viewer and sign in to your account.
-
2. Click Add Model.
-
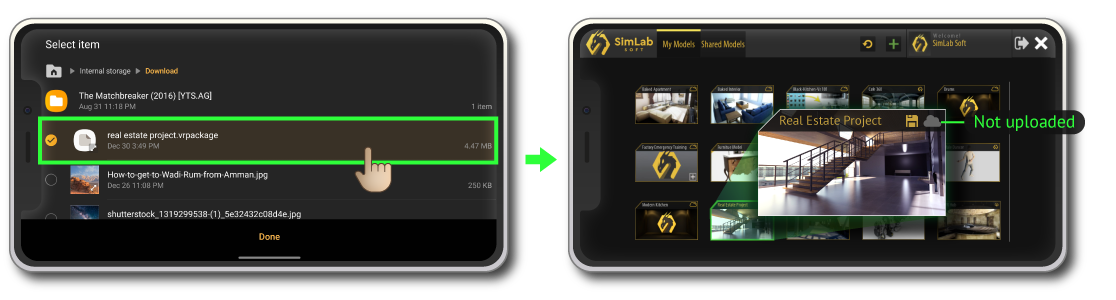
3. Browse a VR package on your device, then the model will be added to the list (locally)
-
4. Now to upload the model to the cloud, select it, then click ''upload'' button
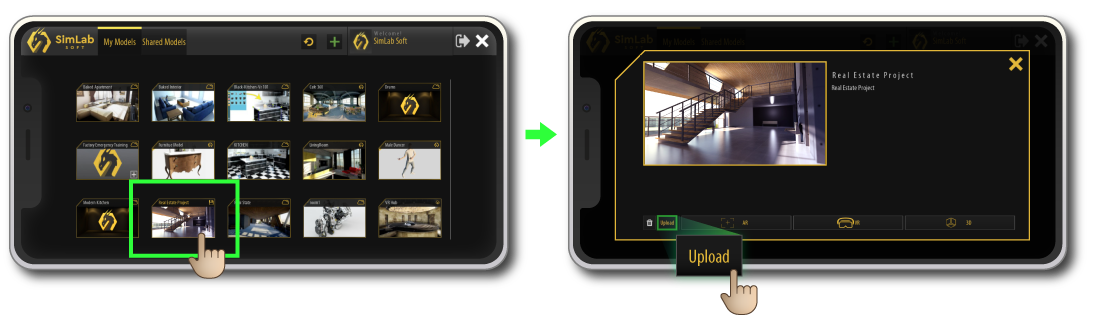
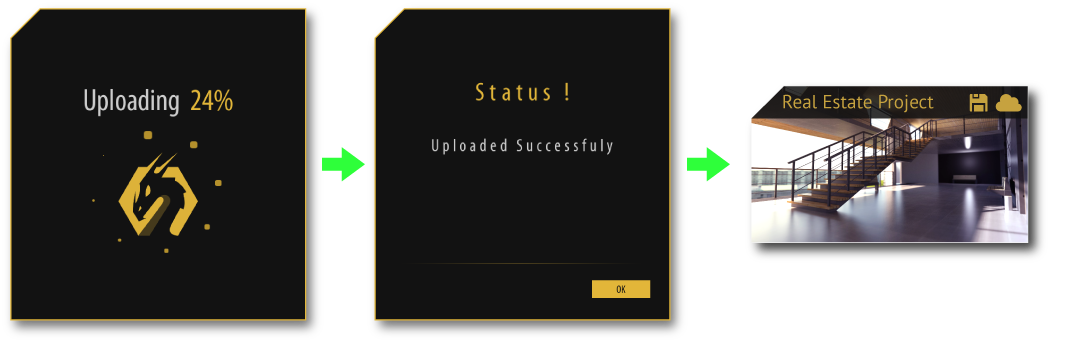
Done Now the model will start uploading, once its done it will show a pop-up message (Uploaded Successfully), then the model can be found under MY Models tab and will be available on all of the connected and paired devices to the used SimLab Account.
How to create VR Packages
The vrpackage file is a 3D VR scene that has been created using SimLab Composer, it is one file that contains all of the scene elements including the 3D models, textures, environment settings, interactive elements, and even the package information such as the title and the description.
SimLab Composer is the tool to use for creating VR scenes (.vrpackage files). Follow the steps bellow to create your own vrpackages so you can upload and share them on simlab cloud.
-
1. Open SimLab VR Viewer and sign in to your account.
-
2. Open SimLab Composer and create a new scene.
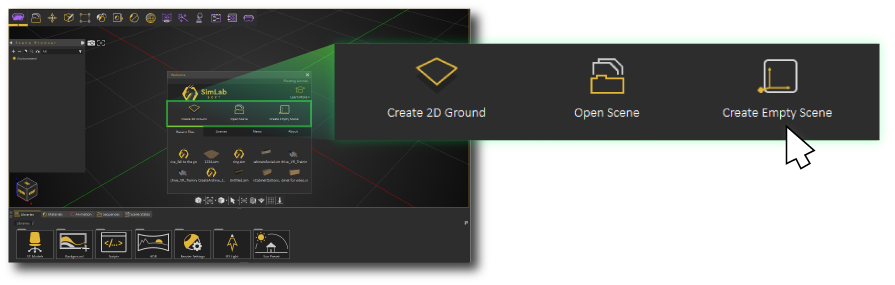
-
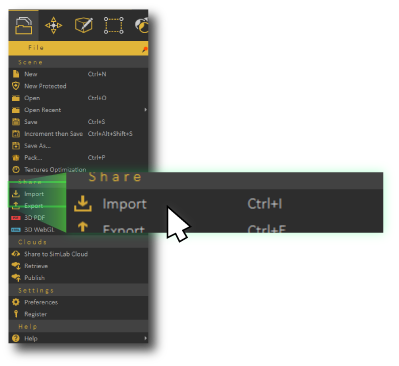
-
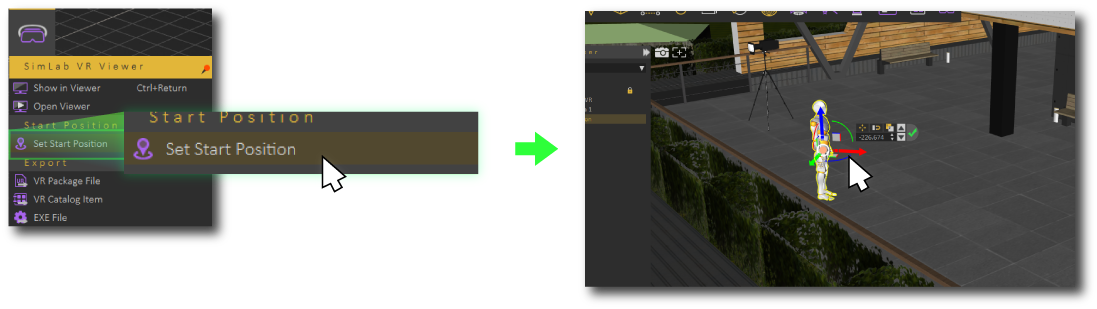
4. Set the VR start position (SimLab VR Viewer > Set Start Position).
-
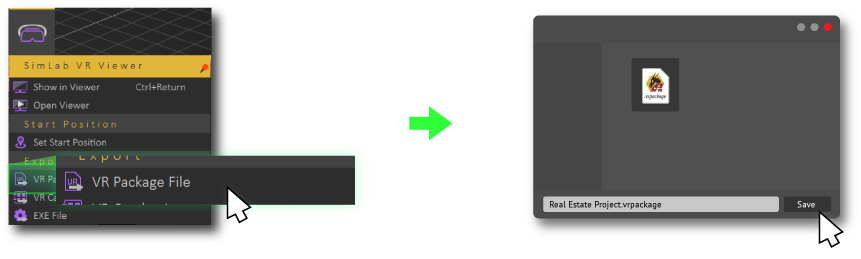
5. Click on Export VR package File (SimLab VR Viewer > VR Package File).
-
6. Fill in the Information and hit ok.

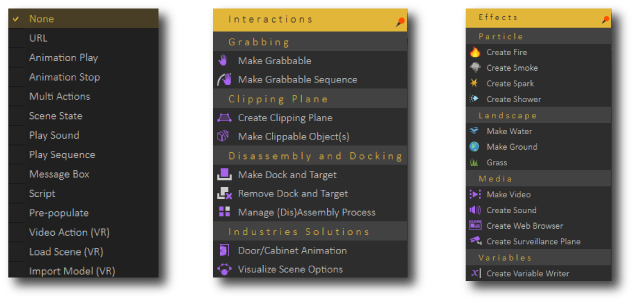
Optional you can add interactions, effects, animations, materials , and much more to bring the scene to life.

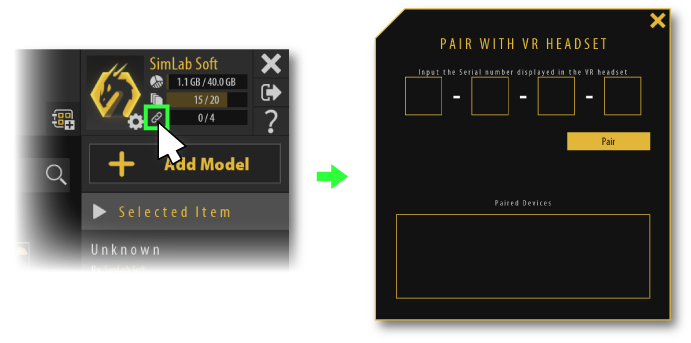
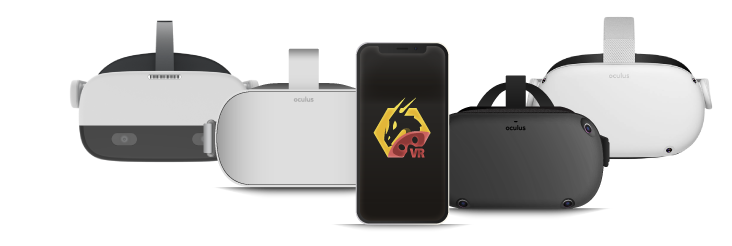
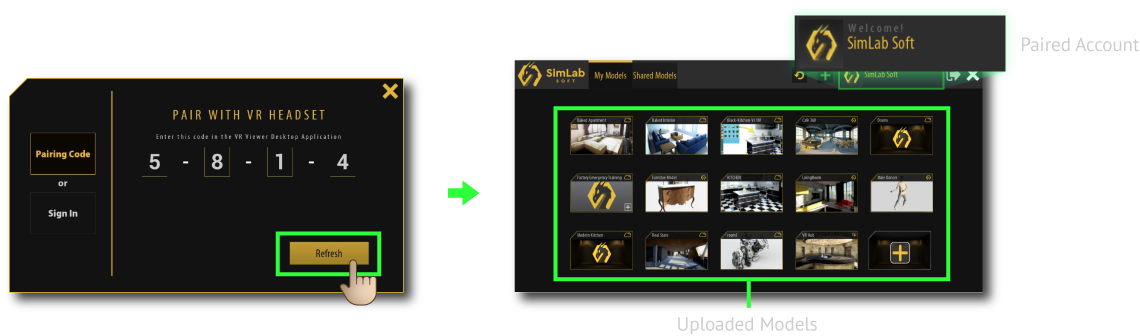
How to Pair a new device ( Android/IOS/Oculus Quest/Pico VR )
Standalone devices can be paired to a SimLab account so it becomes so easy to transfer and sync VR models to them, after pairing all of the uploads and modifications on SimLab cloud will be automatically synced and transferred to all of the paired devices.
Learn how to transfer your models offline
Pairing Steps
-
1. Open SimLab VR Viewer and sign in to your account.

-
2. Click on the Pairing Button to open the pairing dialog.
-
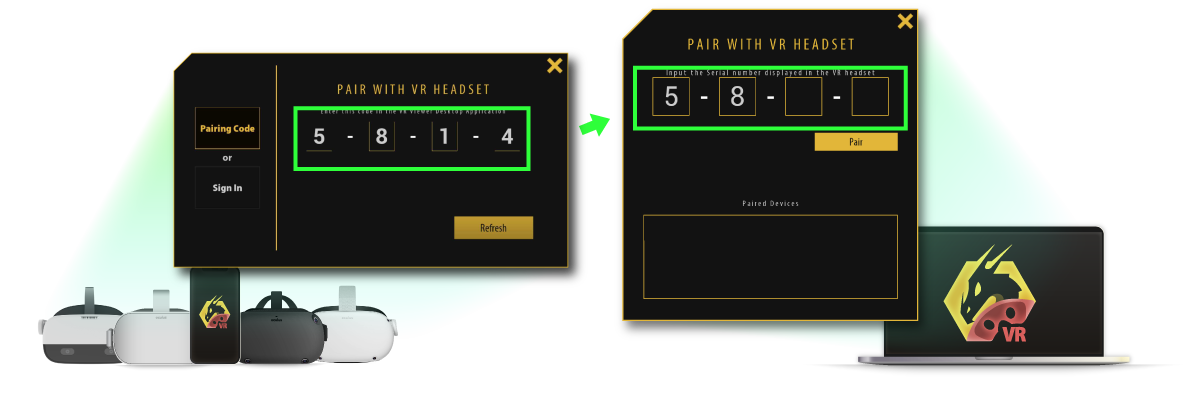
3. Open SimLab VR Viewer on your mobile device(Android, Ios, Oculus Quest, Oculus Go, Pico VR).
-
4. Click sign in button and choose pairing.

-
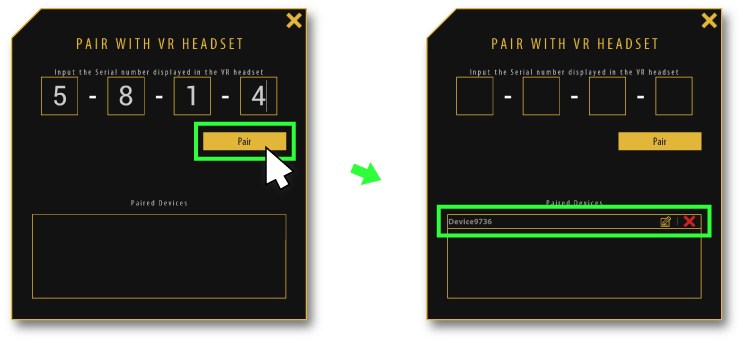
5. Insert the pairing code that shows on your device into your PC.
-
6. Click pair, then the device should appear on the pairing devices list, you can rename it or delete it from this list as well.
-
7. After that, click refresh button on your device, then all of the uploaded models will be loaded.
How to Share VR models with other users
You can share your VR models with specific people from your contacts and groups lists following the steps below:
-
Open SimLab VR Viewer and sign in to your account.
-
1. Select a VR model.
-
2. Click on Share Button.
-
3. Select the contacts you want to share with.
-
4. Click Ok.

The other user will find the shared models as follows:
-
Open SimLab VR Viewer and sign in to your account.
-
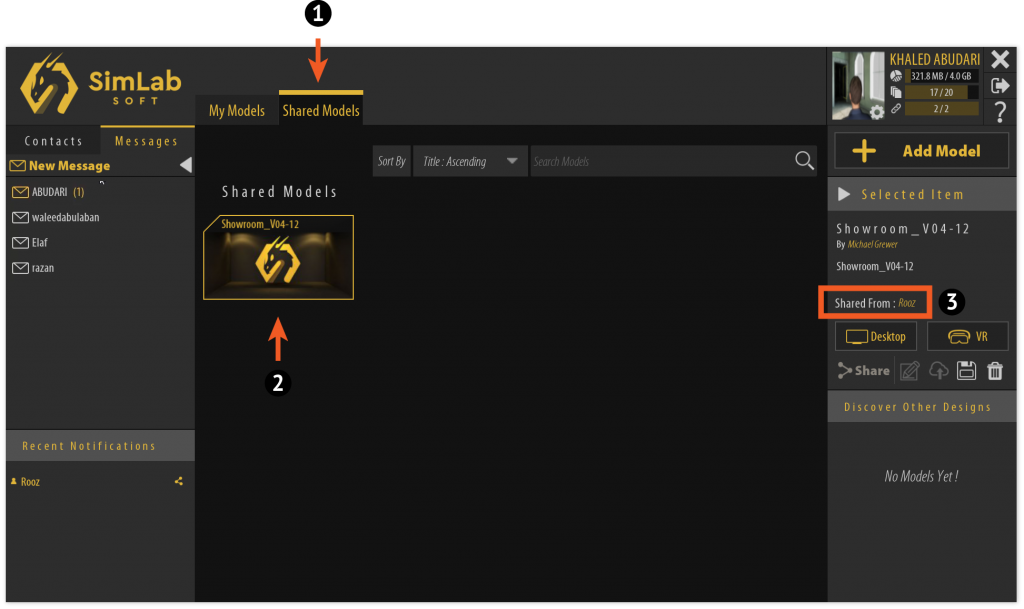
1. Go to the Shared Models tab.
-
2. Select a shared model.
-
3. You can find the person who shared this model with you in the information box.
How to Message other users
You can message your contacts and groups as well, follow the steps below to create a new message:
-
Open SimLab VR Viewer and sign in to your account.
-
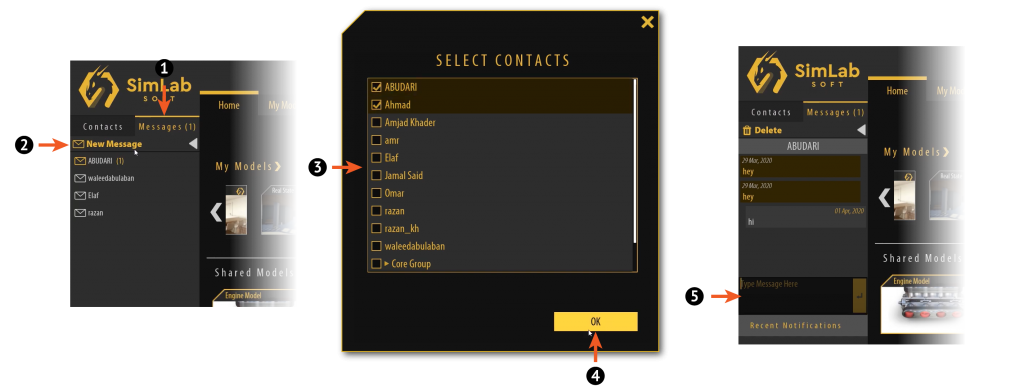
1. Go to the Messages tab.
-
2. Click on New Message button.
-
3. Select a user or a group.
-
4. Click Ok.
-
5. Type the text message you want then hit Enter.
How to Manage Contacts and Groups
The user can simply add contacts by entering their email address, after adding contacts we can message them and share VR models with them, we also can arrange them into groups for easier sharing and messaging.
Adding contacts
-
Open SimLab VR Viewer and sign in to your account.
-
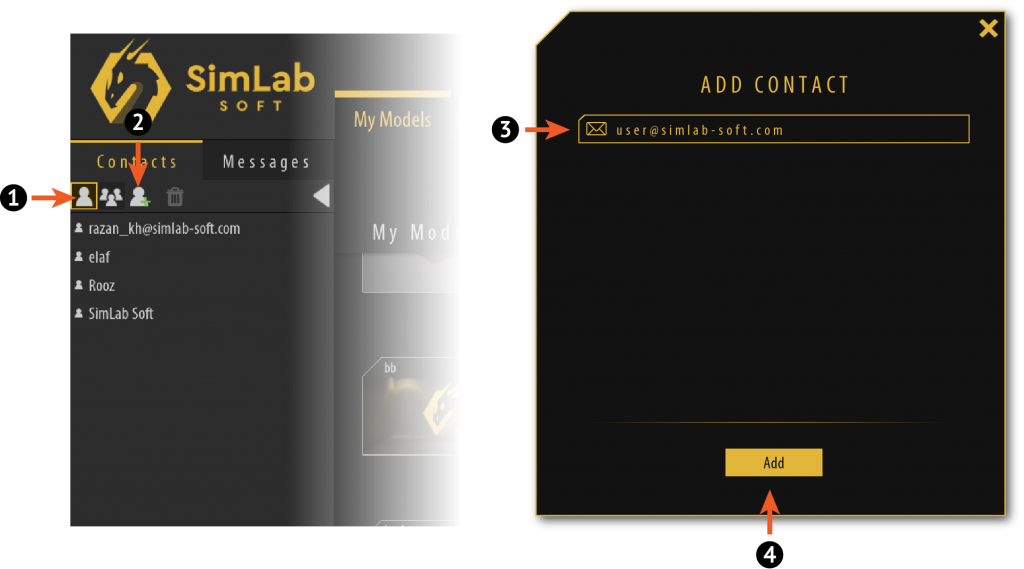
1. Make sure you are on the contacts list.
-
2. Click add new.
-
3. Insert the user's email.
-
4. Click Add.
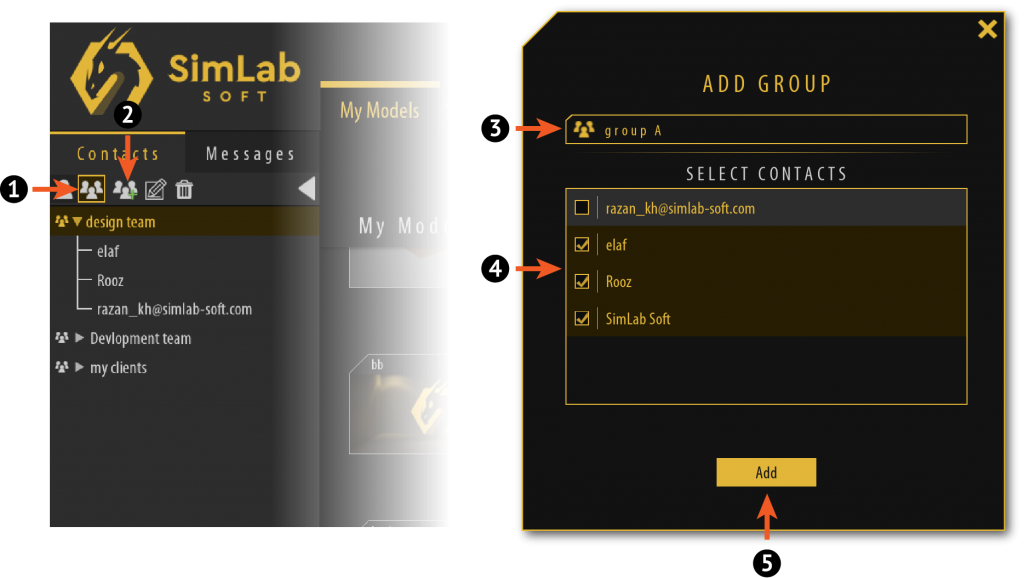
Adding groups
-
Open SimLab VR Viewer and sign in to your account.
-
1. Make sure you are on the group's list.
-
2. Click add new.
-
3. Insert the group name.
-
4. Select the users you want to add to the group (at any time you can modify the selected users).
-
5. Click Add.
How to Activate My Subscription
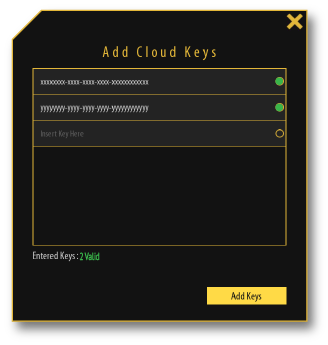
After purchasing a subscription for SimLab Cloud Sharing, you should receive your keys in your email, and they will look similar to this:

Activating Steps
-
1. Open SimLab VR Viewer on your PC and sign in to your account.
-
2. Click on one of the usage icons to open the user's details dialog, then click Add Keys.

-
3. Insert your key(s), then click on Add Keys.
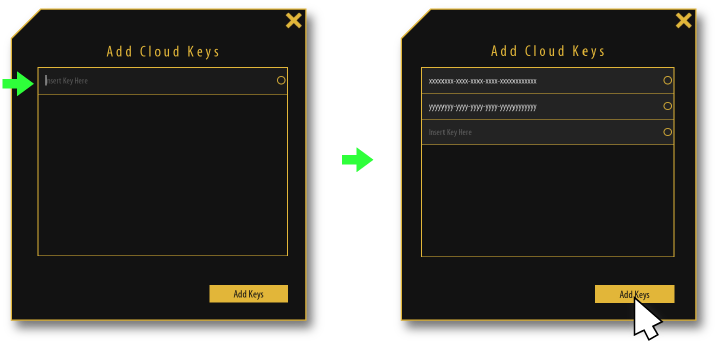
-
4. You should have been activated successfully now, the activated keys will show green dots beside them.